

Key Takeaways
A careful process makes panel beater engine parts easier to select, source, and fit after a collision.
- Inspect visible and hidden damage before ordering components.
- Confirm vehicle identity, engine code, and part compatibility.
- Compare genuine, aftermarket, recycled, and refurbished options fairly.
- Test electrical, cooling, fuel, and safety systems after installation.
- Explain costs, warranties, timing, and repair limits clearly to the owner.
Understanding panel beater engine parts
Collision repairs often involve more than reshaping body panels. A front or side impact can damage cooling, electrical, intake, mounting, and accessory components around the engine. Understanding the wider group of parts helps a repairer avoid treating one broken item as an isolated problem.
What counts as an engine part after a collision
The term can cover components directly attached to the engine as well as systems that allow it to run safely. Depending on the vehicle and impact, this may include radiators, fans, hoses, brackets, wiring, sensors, air-intake parts, engine mounts, pulleys, and fluid reservoirs. The exact boundary varies by workshop and estimate, so the repair order should describe each component clearly.
A panel beater may also coordinate with mechanical technicians when damage reaches the engine itself. Body repair and mechanical repair overlap around the front support, cooling pack, wiring looms, and mounting points. Clear handover notes prevent a damaged part from being missed during dismantling.
How body damage can affect engine components
A bent front rail or radiator support can shift components without making them look broken. A fan may still turn by hand but sit too close to the shroud, while a hose can appear intact yet rub against a damaged bracket. Fluid leaks, unusual belt alignment, or crushed wiring should therefore be treated as clues rather than minor cosmetic defects.
The repairer should inspect surrounding panels and mounting points at the same time. Guidance on the broader collision repair process is useful for understanding why dismantling, assessment, and refitting need to work together rather than happen as separate tasks.
When to repair, replace, or reuse a part
Repair is sensible when a component remains structurally sound and the manufacturer permits the relevant work. Replacement is usually safer when a part is cracked, heat-damaged, distorted, contaminated, or likely to fail under normal operating pressure. Reuse can make sense for an undamaged bracket, cover, or accessory, but it should never be based only on appearance.
The decision should consider safety, reliability, labor, availability, and warranty terms. A documented decision is especially valuable when an owner chooses a lower-cost used component or when an insurer requires an explanation for the selected repair method.
Why accurate vehicle identification matters
A vehicle’s badge is rarely enough to identify a replacement component. The same model may use different engines, transmissions, sensors, cooling layouts, or wiring connectors across years and markets. Record the VIN, build date, engine code, transmission type, and any relevant option package before placing an order.
Photographs of connectors, mounting holes, labels, and damaged parts can support the search. They also give the supplier useful evidence when a catalog description is incomplete or a part has several revisions.
Inspecting engine damage after an accident
Inspection should begin before parts are ordered or the vehicle is returned to the road. The aim is to establish what has been damaged, what may have shifted, and what still needs testing. A methodical inspection reduces supplements and makes the estimate easier to defend.
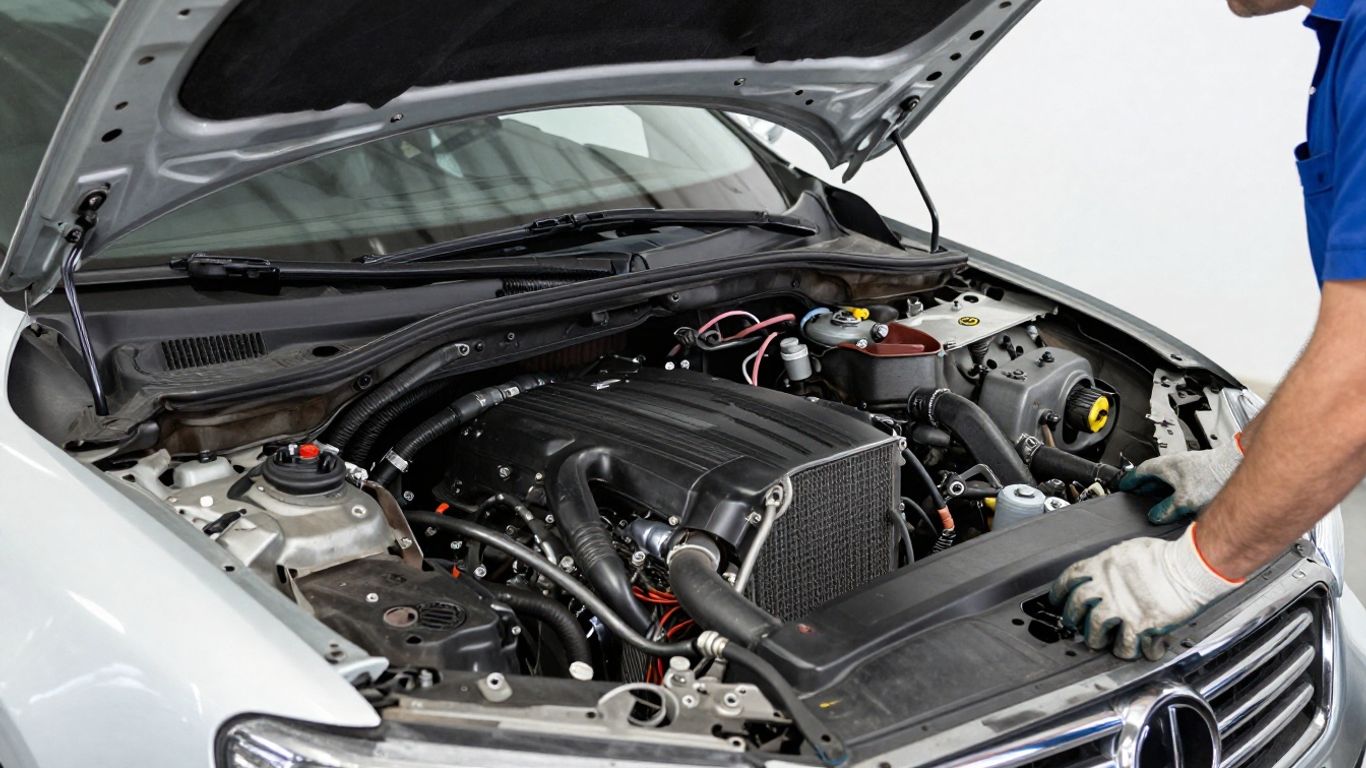
Checking visible damage under the hood
Start with a safe visual examination of the engine bay, including the radiator pack, fan assembly, belts, hoses, battery area, fuse boxes, air box, fluid reservoirs, and visible wiring. Look for fresh leaks, broken clips, displaced brackets, pinched cables, and contact marks. Compare the left and right sides where possible; an unusual gap often reveals movement that a cracked component alone does not show.
Do not run the engine simply to see whether it starts. A vehicle can run with restricted cooling, damaged mounts, or a fluid leak, and doing so may increase the damage. Secure the vehicle, follow workshop safety procedures, and escalate uncertain mechanical issues to the appropriate technician.
Identifying hidden structural and mechanical issues
Hidden damage may sit behind the bumper, under the radiator, or at the engine and transmission mounts. Measurements can reveal a shifted support even when the upper panel looks close to its original position. Check for crushed condenser fins, bent coolant lines, altered exhaust clearances, and marks showing that a pulley or fan has contacted nearby parts.
It is also worth considering the direction and force of the impact. A front corner strike may affect suspension and steering while loading the engine bay diagonally. A rear impact may disturb exhaust, fuel, or transmission-related components even when the front of the vehicle appears untouched.
Using diagnostic scans and pressure tests
A scan tool can identify stored faults, communication problems, and sensor readings that are not visible during a walk-around. Pressure testing can help locate cooling-system leaks, while electrical checks can confirm power, ground, continuity, and connector condition. These tests should follow vehicle-specific procedures and use suitable equipment.
A scan does not replace physical inspection. Fault codes may be consequences of a disconnected harness rather than failed sensors, and a quiet pressure test does not prove that every mounting point is sound. Use test results alongside photographs, measurements, and technician observations.
Documenting damage for estimates and insurance claims
Photograph the vehicle before dismantling, then record newly exposed damage as components are removed. Label images with the area, part, and direction of impact where the workshop system allows it. The estimate should distinguish inspection findings, required replacement parts, labor, calibration, fluids, and any pending diagnostic work.
This record supports conversations with insurers and owners without overstating what is known. It also creates a useful baseline if hidden damage appears during repair or if a part arrives with an unexpected fitment issue.
Choosing the right replacement parts
There is rarely one universal answer to a replacement-parts decision. The best choice depends on the part’s safety role, availability, condition, warranty, and total installed cost. A transparent comparison is more useful than treating one category as automatically superior.
Comparing original equipment and aftermarket parts
Original equipment parts are designed for the vehicle’s specified application, but price and availability can vary. Aftermarket parts may provide a practical alternative when the manufacturer’s requirements are met and the supplier can verify fitment and quality. For cooling, restraint-related, steering, or structural applications, the required specification deserves particular attention.
Compare more than the catalog price. Include delivery, seals, fasteners, fluids, programming, labor, and the cost of correcting a poor fit. The repair plan should state what type of part is being proposed so the owner and insurer understand the choice.
Evaluating recycled and refurbished components
Recycled components can be suitable when their condition, source vehicle, mileage, and testing history are known. Refurbished parts may also be useful when the refurbishment process and warranty are clearly documented. Avoid assuming that a clean appearance proves serviceability.
Ask whether the part was inspected for cracks, corrosion, contamination, electrical function, or pressure integrity as appropriate. A used radiator, fan motor, or wiring harness needs a different assessment from a simple plastic cover, and the risk should be reflected in the warranty and return terms.
Matching parts by make, model, year, and engine code
Fitment should be checked using several identifiers rather than a single search result. Compare the VIN or registration record with the supplier catalog, then verify engine code, connector shape, mounting pattern, dimensions, and any superseded part number.
The following checks are useful before an order is released:
- Confirm the vehicle identification number and engine code.
- Compare photographs, connector positions, and mounting points.
- Check whether the part number has been superseded.
- Confirm left-hand or right-hand orientation where relevant.
This short process catches many errors before a vehicle occupies a repair bay. It also helps when sourcing from a panel parts selection, where the listing may describe a different type of equipment or application than the damaged vehicle.
Checking quality, warranties, and return policies
A written warranty should explain the covered failure, duration, exclusions, and claim process. Return policies matter just as much, especially for electrical items, painted components, and parts that require special ordering. Confirm whether opened packaging, installed parts, or programmed modules can be returned.
Keep the invoice, part number, supplier notes, and photographs of the received component. Those records make it easier to resolve a mismatch without confusing a supplier’s responsibility with an installation issue.
Sourcing panel beater engine parts
Sourcing works best when the repairer begins with a complete specification rather than a vague description such as “front engine parts.” Suppliers need enough information to search accurately, and the workshop needs a realistic delivery date before promising completion. A good process balances speed with traceability.
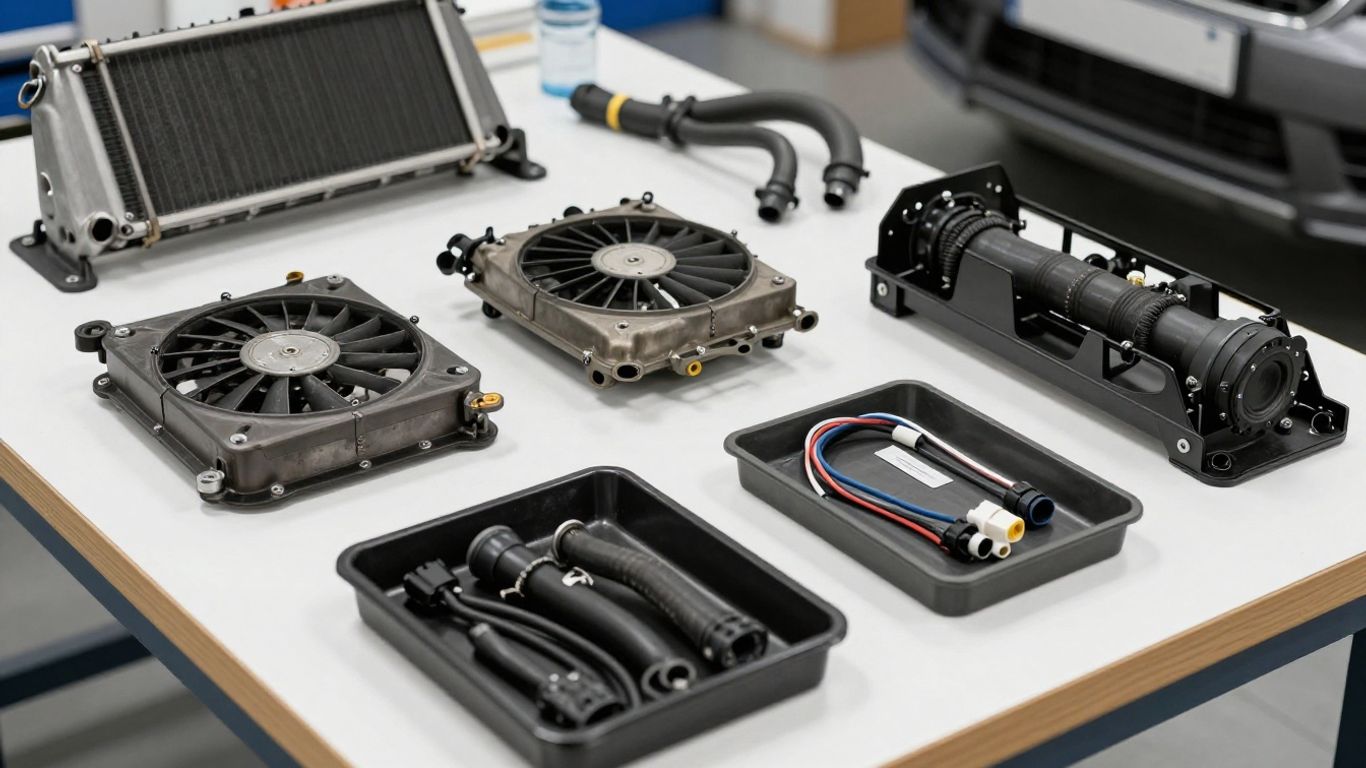
Finding reliable automotive parts suppliers
Start with suppliers that can identify parts by VIN, engine code, or verified catalog data. Ask whether the item is new, genuine, aftermarket, recycled, or refurbished, and request photographs when the condition affects the decision. A clear answer is more valuable than a quick promise that a part will fit.
A nationwide car-parts network can make the search faster by connecting customers with used, genuine, and aftermarket options across major cities and regional locations. Even then, the repairer should independently confirm the specification before accepting delivery.
Buying from salvage yards and dismantlers
Dismantlers can be a useful source for discontinued, unusual, or cost-sensitive components. Record the donor vehicle details, mileage where available, damage location, and any testing performed before purchase. Avoid parts exposed to the same collision force unless their condition has been carefully assessed.
For assemblies, ask whether brackets, sensors, caps, clips, and wiring are included. A low headline price can become less attractive when several small pieces must be sourced separately.
Ordering parts through dealer networks
Dealer networks can help with current part numbers, supersessions, technical notes, and vehicle-specific components. They may be particularly useful when a module, sensor, or cooling component has several revisions. However, availability and lead times still need to be checked against the repair schedule.
The order should include the complete vehicle identification details and a written description of the required component. That reduces the chance of receiving a visually similar part with a different connector or mounting arrangement.
Verifying availability, delivery times, and fitment
Before promising a completion date, confirm whether the part is physically in stock, awaiting transfer, or still subject to supplier confirmation. Ask about freight damage procedures and inspect the package before installation. For fragile radiators, fans, and plastic housings, photograph the packaging if damage is visible.
Useful automotive repair tools can support measuring and dismantling, but tools do not replace part verification. Trade workshops may also review professional panel tools when planning the equipment needed for repeated body and component work.
Installing and testing replacement components
Installation is the point where a correct part can still be compromised by rushed preparation. The vehicle should be stable, clean connection points should be protected, and the repairer should know which systems require bleeding, programming, calibration, or post-repair inspection. A fitting checklist helps maintain consistency without replacing technical judgment.
Preparing the vehicle for engine-part installation
Disconnect power as required by the manufacturer and protect exposed openings from dust and moisture. Compare the replacement part with the original before removing the damaged component, checking connectors, brackets, hoses, seals, and mounting points. Replace one-time-use fasteners, seals, clips, or fluids when the procedure calls for them.
Clean damaged areas carefully and look again for distorted supports. Installing a new radiator or fan into a bent mounting structure can create noise, vibration, leaks, or premature failure.
Following manufacturer repair procedures
Manufacturer procedures set the relevant sequence, torque values, fluid requirements, tightening methods, and safety precautions. They may also specify special tools or post-repair programming. Generic experience is useful, but it should not override vehicle-specific instructions.
Record any deviations and the reason for them. If a procedure is unavailable or unclear, pause the work and seek reliable technical information rather than guessing at a critical connection or adjustment.
Reconnecting electrical, cooling, and fuel systems
Reconnect systems methodically, checking that every connector locks and every harness is routed away from heat, sharp edges, moving parts, and pinch points. Cooling systems may require bleeding, while fuel-related work demands strict fire prevention and leak checks. Electrical connections should be tested for correct power, ground, and communication where applicable.
Replace damaged clamps and seals rather than relying on parts that have lost tension. After fluids are restored, inspect the vehicle for leaks before operating it at normal temperature or load.
Testing performance before returning the vehicle
The final test should cover starting, idle quality, temperature control, warning lamps, fluid levels, fan operation, charging, and any systems affected by the collision. Road testing should be appropriate to the repair and carried out only after stationary checks are complete. Re-scan the vehicle when required and record the results.
Listen for new vibration, rubbing, belt noise, or airflow problems. A short final inspection after the test can reveal a loose clip or seep that was not present when the vehicle was cold.
Avoiding common engine-parts repair mistakes
Most avoidable problems begin before installation. A rushed estimate, an unverified catalog match, or a decision based only on the cheapest price can create delays and repeat labor. Good repair control means checking the surrounding story of the collision, not just replacing the visibly broken item.
Installing parts without confirming compatibility
A part can share a name and still differ by engine, market, connector, orientation, or revision. Confirm the complete fitment information before opening packaging or modifying a component. If a replacement does not match the original, stop and resolve the discrepancy rather than forcing it into place.
Overlooking related collision damage
Replacing a cracked fan shroud will not correct a shifted radiator support. Similarly, a new hose cannot compensate for a damaged fitting or a distorted engine mount. Reinspect neighboring systems after dismantling and update the estimate when evidence changes.
Using low-quality components to reduce costs
The cheapest part can carry a higher installed cost if it leaks, vibrates, fails electronically, or requires repeated removal. Compare warranty terms and supplier support along with price. For safety-sensitive or heat-sensitive applications, quality and documented suitability should lead the decision.
Failing to calibrate sensors and driver-assistance systems
Some collisions disturb cameras, radar, steering-angle sensors, or other systems even when the engine repair appears complete. Follow the vehicle’s requirements for calibration and alignment after relevant body or suspension work. A warning lamp-free dashboard alone does not prove that every driver-assistance feature is operating correctly.
Managing costs, compliance, and customer expectations
A repair is easier to manage when the owner understands what is known, what is provisional, and what may change after dismantling. Cost control should not mean hiding uncertainty. It should mean separating essential work from optional choices and documenting why each item is included.
Estimating labor and replacement-part costs
Separate parts, diagnostic time, dismantling, installation, fluids, programming, calibration, testing, and likely supplements. Note whether a quoted part is new, genuine, aftermarket, recycled, or refurbished. Delivery charges and return risks also belong in the planning conversation.
When two options are technically suitable, present the installed total rather than comparing component prices alone. This gives the owner a clearer basis for choosing between speed, warranty, availability, and cost.
Meeting safety and environmental requirements
Use appropriate lifting, isolation, ventilation, fire prevention, and personal protective procedures. Collect coolant, oil, fuel, refrigerant, batteries, and damaged components for lawful handling and recycling or disposal. Safety requirements apply during dismantling and testing, not only when the vehicle leaves the workshop.
A repairer should also retain evidence of required inspections, calibrations, and roadworthiness checks. The exact obligations vary by jurisdiction and vehicle, so local rules and manufacturer instructions should guide the final process.
Explaining repair options to vehicle owners
Explain the condition of the original part, the alternatives available, the expected warranty, and the risks of delaying related work. Use photographs and plain language rather than assuming the owner understands technical terms. If an estimate depends on hidden damage, say so before work begins.
A customer may prefer a recycled component to control cost, while another may prioritize a new component and longer coverage. The role of the repairer is to make the trade-offs clear and record the approved option.
Keeping records for warranties and future servicing
Keep the estimate, authorization, invoices, diagnostic results, photographs, part numbers, supplier correspondence, and final test notes together. Record fluid types, calibration results, replaced fasteners, and any advice given to the owner. These details support warranty claims and help the next technician understand what was done.
A well-organized file also makes future servicing more efficient. It shows which components were replaced after the collision and which original parts remain in service.
Conclusion
Choosing and fitting panel beater engine parts requires more than finding a component that looks similar. Careful inspection, accurate identification, sensible sourcing, manufacturer-led installation, and clear records give the repair a stronger chance of being safe, reliable, and fairly priced.
Frequently Asked Questions
What are panel beater engine parts?
They are engine-bay components affected by collision repair, including cooling, electrical, mounting, intake, fluid, and accessory parts. The exact list depends on the vehicle and the location of the impact.
Should damaged engine parts always be replaced?
No. Some parts can be repaired or reused if they remain structurally sound and the relevant repair procedure permits it. Cracked, distorted, contaminated, or safety-critical components generally require more cautious treatment.
How can I confirm that a replacement part will fit?
Use the VIN, engine code, build date, part number, connector details, mounting pattern, and photographs. Do not rely on the vehicle model name alone.
Are recycled engine parts safe to use?
They can be suitable when their condition, source, testing, and warranty are documented. The appropriate checks depend on whether the part is structural, mechanical, electrical, or cosmetic.
What should be tested after an engine-part replacement?
Check leaks, fluid levels, temperature control, charging, warning lamps, belt and fan operation, electrical communication, and abnormal noise. Complete any required scan, calibration, or road test as well.
Why can a collision repair estimate change after dismantling?
Some damage is hidden behind panels or beneath assemblies. Dismantling can reveal bent supports, crushed lines, damaged wiring, or affected mounts that were not visible during the initial inspection.
What records should a repairer keep?
Keep photographs, estimates, approvals, diagnostic results, part numbers, invoices, warranty details, calibration records, and final test notes. These records support future servicing and warranty conversations.